Overview
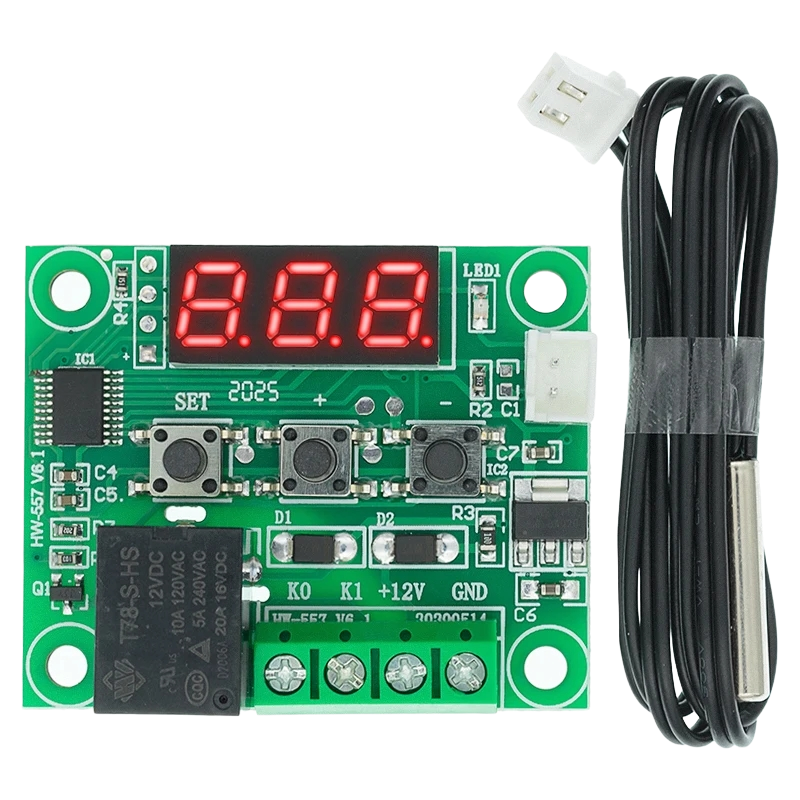
The W1209 Thermostat Control Module is a cost-effective and highly efficient digital temperature controller. It is designed for controlling heating or cooling devices, making it ideal for incubators, aquariums, temperature-sensitive storage, and DIY projects.
Features
- Digital Display: LED screen for real-time temperature monitoring.
- Adjustable Settings: User-configurable temperature limits and control modes.
- Heating & Cooling Control: Supports relay-based switching for both functions.
- High Accuracy: Stable performance with precise temperature readings.
- Compact Design: Easy to integrate into various applications.
Specifications
- Input Voltage: 12V DC
- Temperature Range: -50°C to +110°C
- Temperature Accuracy: ±0.1°C
- Sensor: NTC (10k) Thermistor, waterproof probe
- Control Output: Relay (10A max at 250V AC or 30V DC)
Device setting parameters
Code | Description | Setting Range | Default |
P0 | Heating/Cooling Mode | H/C | C |
P1 | Hysteresis (Return difference) Degrees | 0.1C to 40C | 2C |
P2 | Set Upper Temperature Limit (Degrees) | -50C to 110C | 110C |
P3 | Set Lower Temperature Limit (Degrees) | -50C to 110C | -50C |
P4 | Temperature Offset Correction (Calibration) Degrees | -15C to +15C | 0 |
P5 | Trigger Delay Start (Minutes) | 0-10 Minutes | 0 |
P6/P7 | High Temperature Alarm (Degrees) | -50C to +110C | +100C |
P8 | Factory Reset (Can also press + and – for 5 seconds) | C/H | C |
- Press and hold the SET button for 5 seconds until "P0" appears.
- Use the + or - buttons to scroll through parameters (P0 to P6).
- To change a parameter value:
- Press SET when the desired parameter is displayed.
- Use the + or - buttons to adjust the value.
- Press SET again to save and exit.
Setting the cooling or heating parameter P0:
- C (Default): The relay activates when the temperature setpoint is reached. Use this for air-conditioning systems.
- H: The relay deactivates when the temperature setpoint is reached. Use this for heating devices.
Setting the hysteresis parameter P1:
Hysteresis sets how much the temperature must change before the relay switches. For example, with a hysteresis of 1°C and a setpoint of 20°C, the relay turns off at 21°C and back on at 20°C.
It prevents frequent switching, protecting systems like home HVAC. For precise control, like in aquarium heaters, hysteresis can be minimal or zero.
Note: Depending on the firmware, hysteresis may be added to or subtracted from the setpoint. Test your module to confirm.
Setting the upper limit of the thermostat parameter P2:
The P2 parameter sets the maximum trigger temperature to prevent dangerously high settings.
Example: Set P2 to 30°C for an aquarium to protect fish from overheating.
Setting the lower limit of the thermostat parameter P3:
This parameter limits the minimum trigger temperature that can be set. It can be used as a safety to stop an excessively low trigger temperature from accidentally being set by the user.
Setting temperature offset correction (calibration) parameter P4:
Use this parameter to calibrate the temperature by adjusting it in 0.1° increments, either positive or negative, to correct any discrepancies between the displayed and actual temperature.
Setting the trigger delay parameter P5:
This parameter adds a delay (0-10 minutes) between reaching the setpoint and the relay activating or deactivating. For example, with a 1-minute delay, the relay activates one minute after reaching the set temperature.
Setting the high-temperature alarm parameters P6 and P7:
When P6 is set to ON and a temperature is set in P7, the relay will turn off once the temperature reaches the set value. The display will show ‘HHH’ or ‘—’ to indicate an alarm. The relay will stay off until the temperature drops below this value. The default for P6 is OFF.
Note: Some firmware versions use P6 to set the alarm temperature, while others use P7. Try the other parameter if one doesn't work.
Reset to Factory Defaults P8
Some W1209 firmware versions have a P8 parameter to reset to factory defaults. If available, set P8 to H, then press and hold SET to reset. The display will return to the default temperature setting.
If P8 is not available, press and hold both + and - buttons for 5 seconds to reset to factory defaults.